Move Workspaces in Linkinize: A Step-by-Step Guide
If you’re looking to move workspaces in Linkinize to better manage your teams or streamline collaboration, this guide walks you through it.
🔁 Why Move Workspaces in Linkinize?
Whether you’re organizing by department or consolidating teams, transferring a workspace between organizations helps keep things tidy and efficient.
- Combine multiple teams under one organization
- Use available quota more effectively
- Prepare for organizational changes or handoffs
📦 How to Transfer Workspaces in Linkinize
Here’s how to move a workspace using the Workspace Transfer plugin:
- Go to the source organization
Start by heading to the organization that currently contains the workspace you want to move. - Open Plugins > Workspace Transfer
Click on Plugins in the sidebar, then select Workspace Transfer. - Select your workspace
Choose the workspace you wish to move from the dropdown. - Pick the destination organization
Only organizations where you have permission will appear. - Check available quota
Make sure the new organization has room for both the workspace and its bookmarks. If not, upgrade or clean up before continuing. - Confirm the migration
Review your selection and click Confirm Transfer.
✅ That’s it! You’ve successfully moved your workspace in Linkinize.
🎯 Seamless Organization
Your team can continue working without interruption. Bookmarks, structure, and access stay exactly the same — just under the new organization.
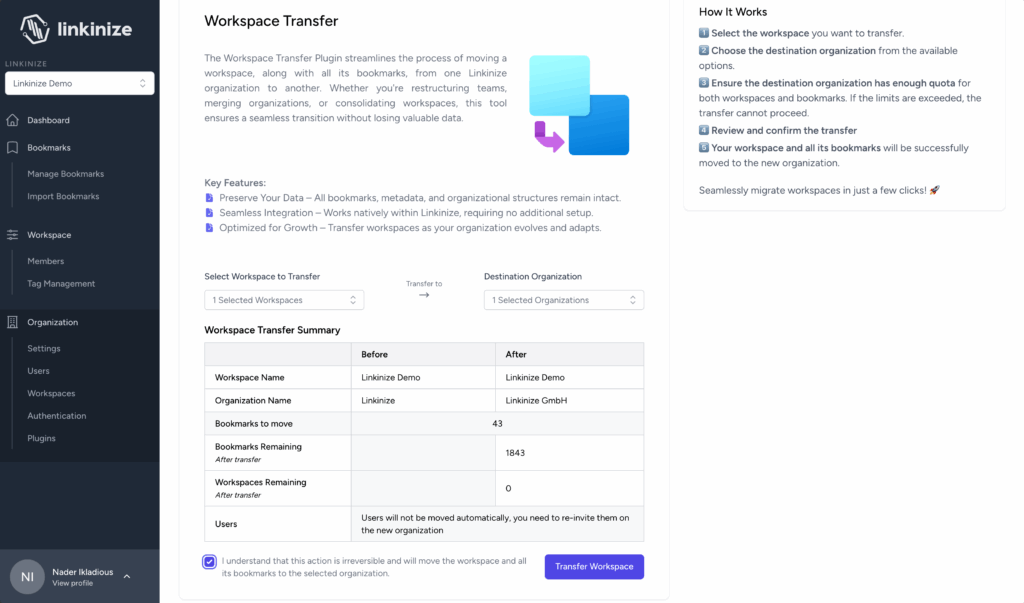
🖼️ Workspace Transfer in Action
Below is a screenshot showing how the Workspace Transfer plugin looks inside the Linkinize dashboard:
🔗 Related Resources
Got questions or feedback? Reach out to us anytime — we’re always happy to help you organize better ✨