Setup SAML SSO
SAML (Security Assertion Markup Language) is a standard protocol for single sign-on (SSO) authentication that allows users to access multiple applications with one set of credentials.
In this document, we will show you how to configure SAML SSO login in your Linkinize workspace.
Verify your domain
before anything you would need to verify your domain, this is needed for us to be able to identify your users by using their email addresses. for example, if your company domain name is “google.com” your users with email addresses that end with “@google.com” will be able to login using the SAML.
To verify your domain choose your workspace and on the sidebar click on the authentication menu.
On the authentication page, click on add a domain and enter your domain name.
once you have successfully added your domain, you need to verify your ownership of it.
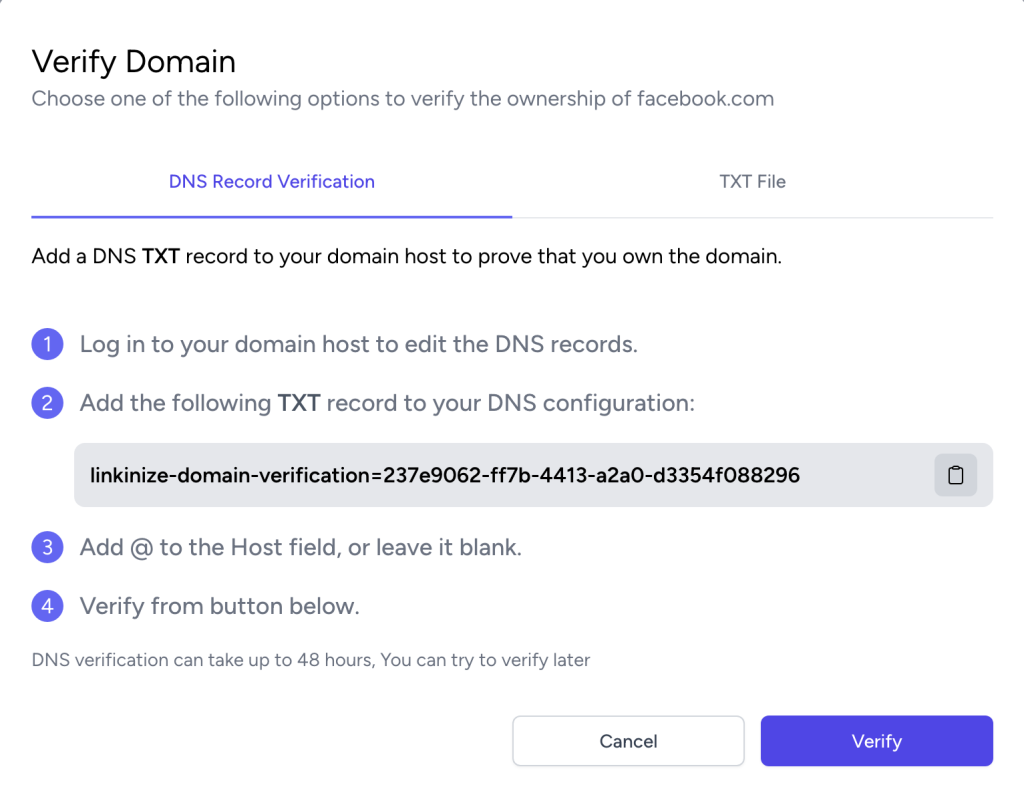
in the domain verification dialog, you will see 2 methods of verification, you can either use a TXT DNS record or upload a text file to perform domain verification.
Configure SAML
Once you are done with your domain verification, you can configure SAML for your domain.
Click on the configure button next to your domain name until you see the following dialog:
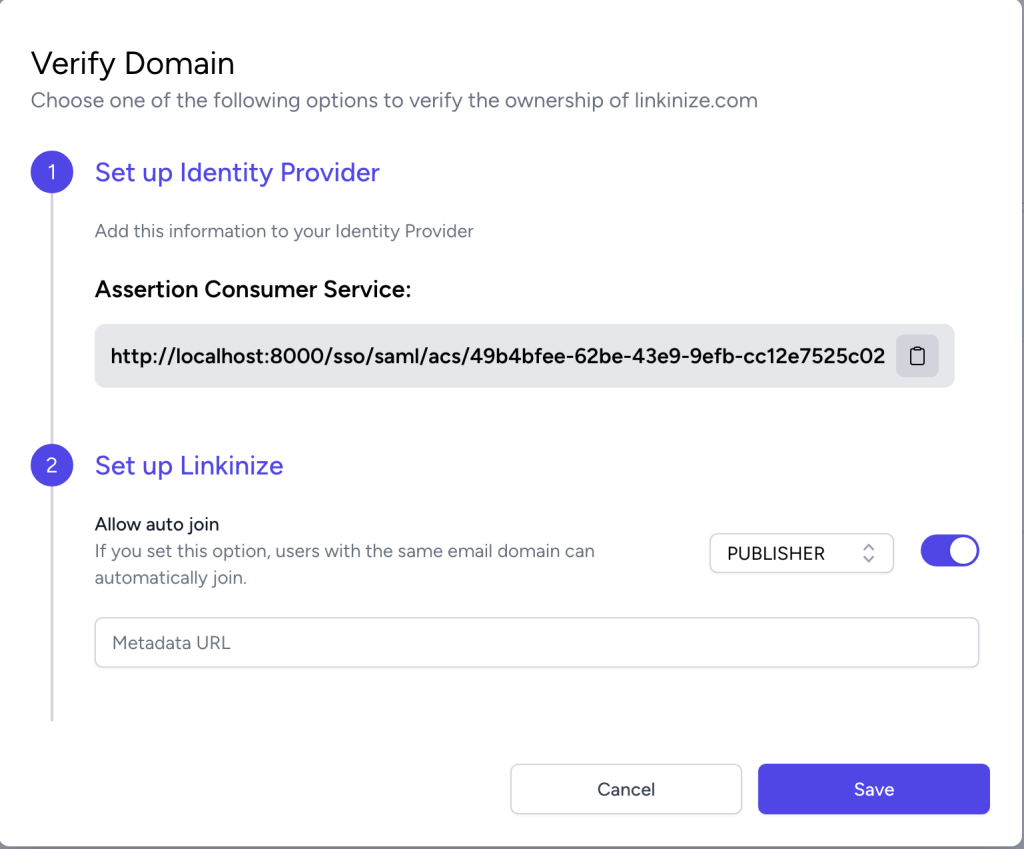
- Copy the assertion consumer service and place it as a redirect URL in your identity provider.
- Select the default role you wish to be assigned to your employees when they log in for the first time.
- provide a URL to your SAML identity provider metadata.
once configured your users will be able to use your company email address to perform SAML login.
Considerations for SAML Configuration
Your SAML server should include the following attributes in the response:
http://schemas.xmlsoap.org/ws/2005/05/identity/claims/emailaddresshttp://schemas.xmlsoap.org/ws/2005/05/identity/claims/name
Your IDP should use the following Binding for Single Sign On:
urn:oasis:names:tc:SAML:2.0:bindings:HTTP-POST
2 comments